

For Valentine's Day this year, I decided to use a technique I learned in an art class and combine it with my painting and collage to create some special one-of-a-kind Valentine's. I was pleased with the result. Here's what I did:

First begin by taking a sheet of drawing paper and using different size pencils and both a fine tip and bold tip black sharpie (or other pen) write your name, a word or a phrase over and over in different directions and different sizes until the paper is completely covered. Using different size pencils such as, 2H, HB, B, 2B, 4B, 6B, will give your lines different weights and qualities, light and dark, thick and thin lines. Don't forget the edges, make sure those are covered too.

Once you have completely covered your drawing paper with your writing and have a wide variety of lines, turn the paper over and measure off a grid of 2" squares. Cut the squares.

You will now have a pile of 2 inch squares with very interesting marks on them. Take a look at them and pick out the ones you really like.

Glue them onto a piece of 14" X 17" Bristol. You can use Mod Podge, YES Glue or Matte Medium. Don't try to glue each individual square, spread a bit of glue onto the Bristol and then place the squares. Try to get all of the squares lined up evenly together, but if you have a bit of variation in them because your cutting wasn't exact, don't worry, just get the squares as close as you can. Just don't overlap any squares. If you have any squares over the edges of the Bristol like I did, no worries, just trim off the excess, but do go all the way to the edges. After you get all of your squares glued onto the Bristol, let it dry thoroughly before going on to the next step.

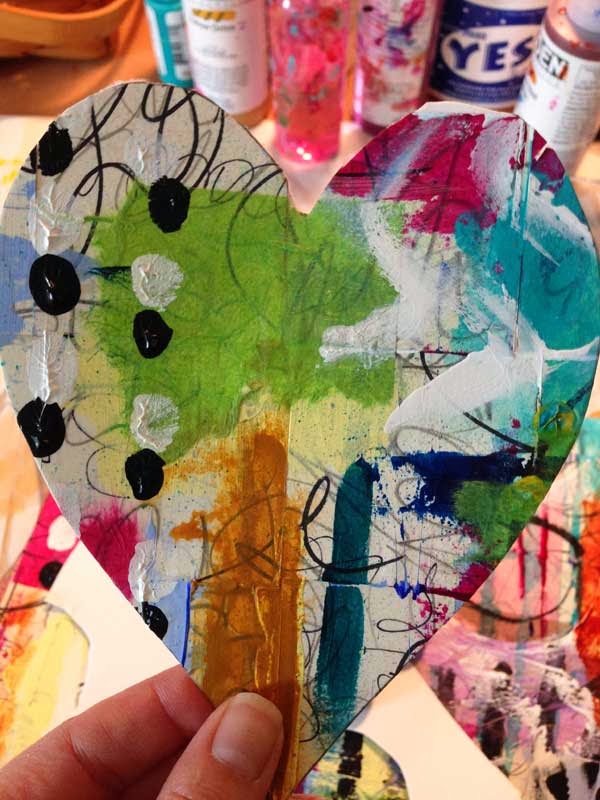
The next step is where we get into painting and collage. I really get into this step and usually forget to take pictures. What you're basically doing is adding layers of paint and paper to your composition. Use a variety of fluid paint, which is transparent and will allow your marks underneath to show through and heavy bodied acrylic paint which will be opaque. I like to start with fluid paint and collage paper and then go on to heavy bodied paint. I then go back and forth until I really like what I see. I also used a variety of printed paper that I like as well as some transparent, hand-made origami paper (the green above) and tissue paper which is transparent. The origami paper is my favorite because you can see the fibers of the paper which makes an interesting texture. Let it dry in between layers so things don't get smeary or muddy. When you have as many layers as you want let it dry completely.

While your composition is drying, take either another piece of bristol or an old file folder like I did (I have so many old file folders and I like to make use of them, rather than throw them out!) Make a stencil by tracing a heart shape and cutting it with an exact knife. When you are finished and your composition is completely dry, float your stencil over your composition to find something you like. Turn your paper around and keep looking. Once you find something you like, place your mask and trace in pencil around the stencil.

Now, cut out your heart.

Now you can add some stamped words, markings in ink or make other finishing touches.

I love this idea! I can't wait to try it for myself.
ReplyDelete